Maternity · indoors
Window light and studio maternity portraits
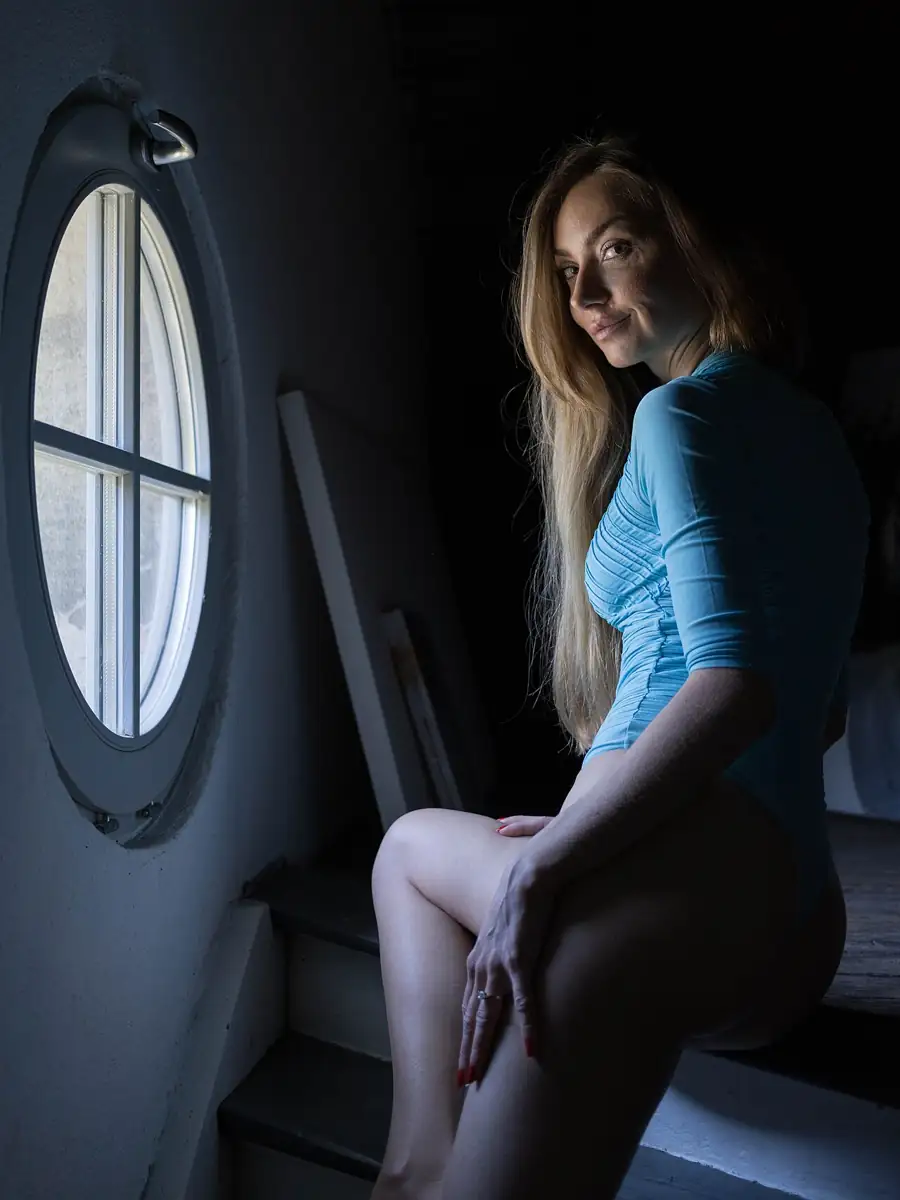
Some of my favorite maternity portraits are made indoors with a single light source. Light from the side, through a window or from one large softbox, falls across the bump and leaves the far side in gentle shadow, and that gradient shows the shape far better than flat, even lighting. It also keeps you out of the heat, close to a bathroom and a comfortable chair, which counts for a lot at 33 weeks.
Frame 01Why side light flatters a bump
A curve only looks round when one side is brighter than the other. If light comes from the camera position, the bump flattens out. If it comes from the side, a soft gradient runs from bright to dark across it, and the eye reads that as depth. Painters used the same trick long before cameras existed.
Standing sideways to a window, with the bump toward the light, gives this effect straight away. A partner standing behind and slightly into the shadow keeps the attention on the bump. Turn your face a little toward the window, and your eyes pick up a catchlight, the small bright reflection that makes eyes look bright and awake.
Distance changes the look
Light from a window falls off quickly as you move away from it. Stand close, about an arm's length from the glass, and the shadow side goes dark and dramatic. Step back two or three paces and the light wraps more evenly, with softer contrast. I usually start close and move you back a step at a time until the shadow looks the way we want.
Frame 02Finding the right window at home
The best windows let in plenty of light without direct sun falling on you. In the Northern Hemisphere, north-facing windows do this all day. Other windows work well in the hours when the sun is on the opposite side of the house, or on a bright overcast day. If sun does stream in, a sheer white curtain softens it nicely. Growing up in Dalarna, where winter daylight is short and low, I learned early how much a single bright window can do, and I still walk through a client's house looking at windows before anything else.
- Pick the largest window with no direct sun at the time of the session.
- Clear the wall opposite the window, or hang a plain sheet on it as a backdrop.
- Turn off overhead lights and lamps so their warm color doesn't mix with daylight.
- Move furniture so you can stand about an arm's length from the glass, side-on.
- Put a white sheet, foam board or even a light-colored door on the shadow side if you want to lift it.
- Take a test frame, then adjust your distance from the window before changing anything else.
The guide to shooting portraits in daylight has more on reading window light and choosing the time of day.
Common mistakes at the window
- Facing the window straight on. The light goes flat and the bump loses its shape; turn sideways.
- Standing in a patch of direct sun. Hard bright stripes across skin rarely look good, so move to the edge of the patch or draw a sheer curtain.
- Leaving a lamp on in the corner. It adds an orange cast to one side of the frame that is hard to fix later.
- Shooting from too close with a wide lens. It stretches whatever is nearest the camera, which is usually the bump.
Frame 03Starting camera settings
For hobbyists photographing a partner or friend, these are reasonable starting points for window light. Adjust from there to suit the light in your room.
| Setting | Starting point | Why |
|---|---|---|
| Aperture | f/2.8 to f/4 | Soft background, bump and face both sharp |
| Shutter speed | 1/125 s or faster | Freezes small movements and breathing |
| ISO | 400 to 1600 | Raise it before slowing the shutter |
| White balance | Daylight or cloudy | Keeps skin warm and consistent |
Expose for the bright side of the bump and let the shadow side fall darker. A moderate portrait lens, somewhere around 50mm to 85mm on a full-frame camera, gives a natural look in an ordinary room. My notes on which lens suits which portrait compare the options if you're shopping.
Frame 04The studio version
In a studio, a large softbox or octabox placed to one side does the same job as a window, with the advantage that it never changes with clouds or the time of day. I often add a reflector or a white board on the shadow side to lift it a little. Some moms prefer to let the shadow go almost black for a dramatic, fine art look against a dark backdrop. Ask to see examples of both before your session so you can say which you like.
When I worked in the studio, I liked having that control for maternity work: the light stays put, the room stays warm, and a changing area is right there. If you're curious how a single flash and modifier can stand in for a window, read about lighting a portrait with a single flash.
Backdrops and fabric
Studio maternity portraits tend to use very simple backgrounds: plain black, white, or a soft gray canvas. Long stretchy fabric, wrapped around the body or draped from the shoulders, is a studio staple because it moves when someone off camera lifts it and catches the side light well. If you like that look, ask whether the photographer has fabric and gowns you can use.
Frame 05Black and white or color
Black and white
Removes distracting colors in the room, smooths skin tones and puts all the attention on shape and expression. It suits fitted dresses, bare bumps and simple fabric wraps.
Color
Keeps the warmth of skin and the softness of pastel fabrics. It suits lifestyle frames at home and pairs well with a colorful newborn gallery later.
I usually deliver a mix, and many families choose a black and white image for the wall and color ones for the album. A large monochrome bump portrait in a simple frame looks good in almost any room; the page on choosing canvas and framed prints for the wall covers sizes and finishes. The page on monochrome and selective color explains how these conversions are done well.
Frame 06Poses that suit window light
Profile poses are the classic window portrait: side-on to the glass, one hand under the bump and one on top, chin turned toward the light. Seated on a stool with your back to a wall works well too, and gives your feet a rest. Looking down at the bump, then up out of the window, gives two different moods from the same spot. If your partner or children join, keep them on the shadow side so you stay in the brightest light. More ideas are in posing with your partner and kids.
Frame 07What to wear indoors
Close indoor frames show fabric texture, so choose smooth knits, soft cotton or a simple wrap. A partner's open button-down shirt is a long-standing favorite for a relaxed look. Avoid strongly colored clothing near the window, because it bounces color onto your skin. There is a fuller list in choosing your maternity outfit.
Frame 08Using the same room for the newborn
If you liked the light by your window, ask me to use it again for the newborn session. The bump and then the baby in the same spot make a natural pair of prints. Whether that second session happens at home or in a studio is a separate decision, and my page on newborn sessions in a studio or at home weighs it up. The guide to linking the bump shoot to the baby shoot covers the planning side, and the maternity section overview lists every other guide.