Craft · close-up
Macro photography basics
When I have a free hour just to play, I often reach for my macro lens. Close-up work slows me down in a good way: a leaf, a drop of water or the curl of a baby's fingers turns into a whole landscape once it fills the frame. Macro photography means photographing small things so close that they land on the sensor at life size, or close to it. Insects, flowers and textures are the classic subjects, and in my portrait work the same skills give me the tiny details parents treasure later, like eyelashes, toes and a wedding ring resting on a swaddle. Below is how magnification and depth of field really behave up close, which tools get you there, and the focusing and lighting habits that keep me from throwing away half my frames.
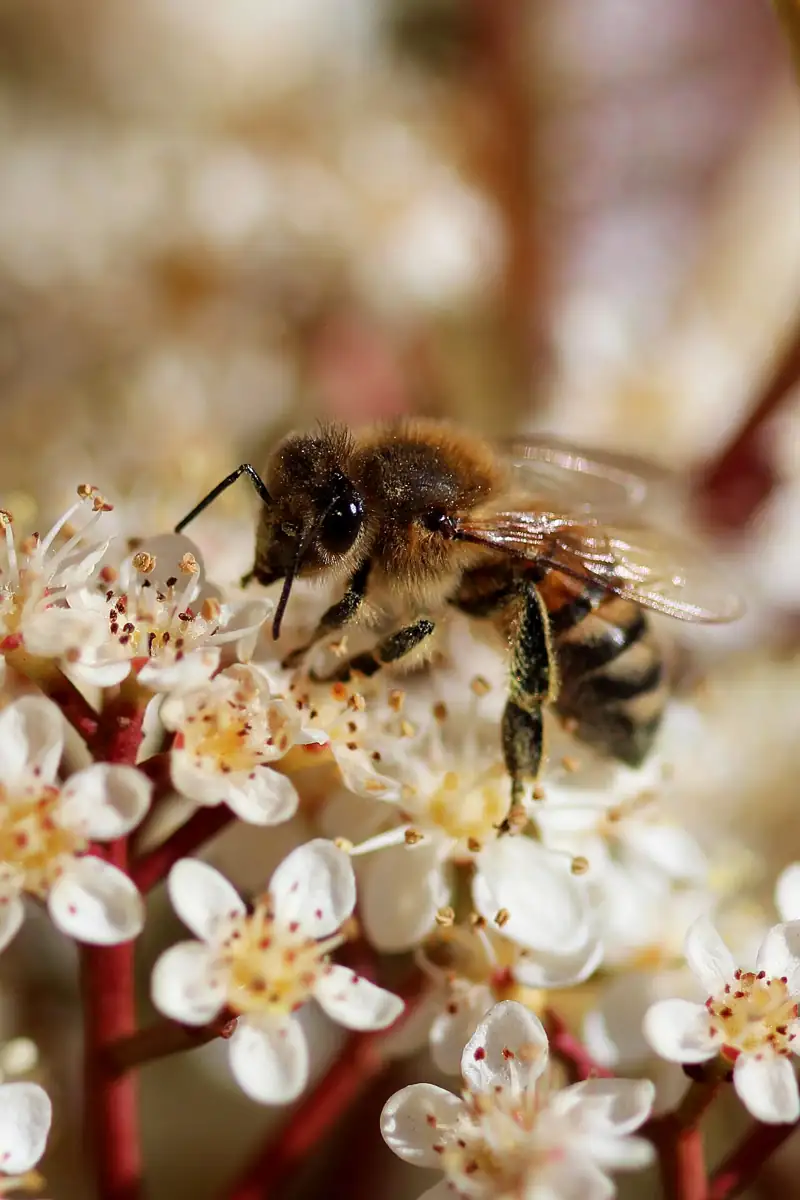
Frame 01What counts as macro
A lens is a true macro lens when it can project a subject onto the sensor at the same size as the subject itself, written as 1:1 or 1x magnification. A ladybug 7mm long fills 7mm of the sensor, which on a full frame camera is a little under a fifth of the frame's height. Many lenses with "macro" printed on the barrel only reach 1:2 or 1:4. That is close-up work rather than true macro, and honestly, for most flowers and baby details, 1:2 is plenty.
Magnification describes the size of the subject on the sensor. A crop sensor camera does not magnify anything; it simply records a smaller area, so the subject fills more of the picture. That is useful, since it gives you a tighter frame from the same distance, but it does not add detail the lens did not resolve.
Minimum focus distance and working distance
Two numbers get confused here. Minimum focus distance is measured from the sensor plane, so a 100mm macro that focuses at about 30cm may leave you only around 15cm between the front of the lens and the subject. That gap is the working distance, and it decides whether your own shadow falls on the flower and whether the bee flies off before you press the shutter.
Frame 02Ways to get close
| Tool | Cost | Notes |
|---|---|---|
| Dedicated macro lens (60mm, 90mm, 100mm) | Highest | Sharp, focuses to infinity, doubles as a portrait lens |
| Extension tubes | Low | Hollow spacers between camera and lens; lose infinity focus and some light |
| Close-up filters | Lowest | Screw on like a filter; quality varies widely |
| Phone clip-on macro lens | Lowest | Fun and pocketable; tiny depth of field, best in good light |
A 90mm or 100mm macro lets you stand farther back than a 60mm, which keeps your shadow off the subject and is less likely to scare an insect. The longer macro lenses also make lovely portrait lenses, a point I come back to in the guide to which portrait lens to buy. A 60mm is lighter and easier to handhold indoors, which is why some newborn photographers prefer it.
I've played with both a dedicated macro lens on my DSLR and a small clip-on macro lens for my phone, and I'd recommend the phone version as a cheap way to find out whether you enjoy this kind of seeing. It won't replace a real macro lens, but it teaches you how little depth you have to work with, very fast.
Extension tubes in practice
Tubes contain no glass, so they don't degrade the image. They work best with a 50mm or 85mm lens. The more extension you add, the closer you can focus and the more light you lose, and you give up focus at a distance while they are on. A set of three tubes is an inexpensive way to turn a portrait lens into a close-up tool for a day.
Frame 03Depth of field is tiny
At macro distances the zone of sharp focus shrinks to millimeters, even at f/8. An insect's eye may be sharp while its legs are soft. These are rough totals for a full frame camera, worked out with the standard close-up depth of field formula, and real lenses vary a little.
| Magnification | At f/8 | At f/16 |
|---|---|---|
| 1:10 (a hand filling the frame) | about 5 cm | about 10 cm |
| 1:4 (a flower head) | about 1 cm | about 2 cm |
| 1:2 (newborn toes) | about 3 mm | about 6 mm |
| 1:1 (an insect's head) | about 1 mm | about 2 mm |
Most macro photographers work between f/8 and f/16 to gain a little depth. Past f/16 diffraction starts to soften the whole image, so stopping down further trades one kind of blur for another. Two other things happen at high magnification: the lens behaves as if it were darker than the aperture shown (at 1:1 you lose roughly two stops of light), and the background melts into smooth color even at f/11. I love that part.
Focus stacking
For still subjects, focus stacking solves the depth problem: take several frames at slightly different focus points and blend them in software. Many newer cameras can shift focus automatically for a stack. Living insects rarely sit still for that, so for them I pick the most important plane, usually the eyes, and line it up parallel to the sensor so as much of it as possible falls inside that thin slice.
Frame 04Focusing and steadiness
- Set the lens to manual focus and choose a magnification first, by turning the focus ring to the closeness you want.
- Rock your body slowly forward and back until the part you want is sharp, rather than turning the focus ring. At 1:1 a centimeter is the difference between sharp and mush.
- Use a tripod for flowers and still life, with a remote release or the two-second self timer so pressing the button does not shake the camera.
- For insects, handhold with flash so the short flash burst freezes movement.
- Shoot in short bursts and breathe out before you press; at these distances a breath moves the camera.
- Check sharpness at full magnification on the screen before you move on, not at home.
Wind is the other enemy. On a breezy morning I hold the stem gently out of frame with one hand, or clip it to a stake, and wait for the lulls.
Frame 05Light for close-ups
Small apertures and close distances mean less light. Overcast days give soft, even light on flowers, which is why I don't mind a gray morning for macro. A small reflector or a white card a few inches from the subject fills shadows. For insects and moving subjects, a flash with a diffuser close to the lens freezes motion and lets you use f/11 or f/16. Ring lights and twin flashes made for macro spread light evenly around the lens.
Natural light
Soft and true to the color of the place, with no extra gear to carry. Needs a tripod or high ISO at f/11, and a still subject. Best for flowers, dew, fabrics and sleeping babies.
Flash
Freezes movement and makes small apertures possible handheld. Can look harsh without a diffuser and often turns backgrounds black. Best for insects and anything that moves.
Morning is the classic time for dew and for cold, slow insects. In South Louisiana the hours after dawn are also the coolest, as I explain in my notes on Gulf South weather. For backlit petals, put the sun behind the flower and a dark background behind that; the petals glow and the background goes almost black.
Frame 06Macro in family photography
Detail shots are a staple of my newborn galleries: tiny fingers wrapped around a parent's thumb, eyelashes, toes, a hospital bracelet, the wedding rings on the baby's blanket. They need only modest magnification, so a macro lens at half life size is more than enough, and a big window is my usual light source, the same soft side light I describe in the natural light portrait guide. The rest of the newborn routine is covered in the newborn session walkthrough.
With a lens a few inches from a sleeping baby, I never ask parents to hold an awkward pose for the sake of a detail shot, and no ring or small object stays near a baby's hands or mouth for longer than the frame takes. Rings rest on the blanket, never on the baby. The full set of habits is in my page on keeping newborn posing safe.
The same lens earns its place at christenings, where the lace on an heirloom gown and the water in the font make beautiful close frames; I write more about that day in christening and baptism portraits. Close-ups also tend to convert beautifully, since texture carries the picture when color is gone, as in black and white conversions.
Outdoors, a macro lens is a good companion for nature walks with a camera, when the birds stay out of range and the spiderwebs do not. More guides are in the craft and gear section.