Craft · architecture
Architecture and interior photography
Most of my work is people, but over the years my commercial work has also included architecture and hotels: lobbies, guest rooms, dining rooms and the outside of the building at dusk. I enjoy the change of pace. A room holds still and never needs a snack break. What it does need is patience with details that are easy to ignore in a portrait, mostly walls that lean, light from three different sources and clutter nobody noticed until it was in the frame.
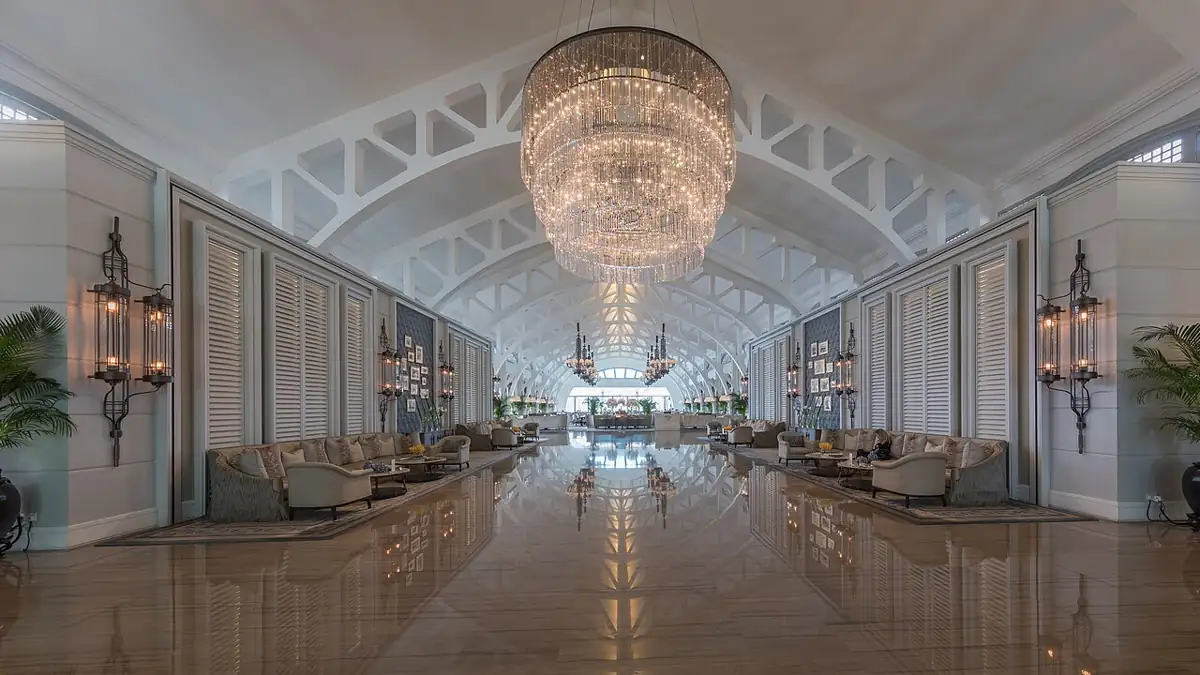
Frame 01Keep verticals straight
The most common mistake in architecture is tilting the camera up, which makes walls lean inward as if the building were falling backward. Our eyes correct for this when we stand in a room; the camera does not. A slight lean looks like a mistake, while a dramatic one, looking straight up a tower, can look deliberate, so either keep it level or commit to the angle.
- Put the camera on a tripod and level it side to side with the bubble level or the camera's electronic level.
- Level it front to back as well, so the back of the camera is parallel to the walls. This is the step people skip.
- If the top of the building is cut off, step back or switch to a wider lens instead of tilting up.
- Frame a little wider than you need, so you can crop away the extra floor or foreground later.
- Turn on the grid display and check the vertical lines near the edges of the frame, where leaning shows first.
- Fix any small remaining tilt in editing with the perspective or upright tools, and leave room at the edges because the correction crops in.
Tilt-shift lens
Shifts the view up without tilting the camera, so lines stay straight in the camera and you keep full resolution. Expensive, manual focus, slower to use.
Software correction
Free and quick with any wide lens. Stretches the top of the frame, costs some resolution and needs extra room around the subject.
Frame 02Lenses and camera height
Wide lenses in the 16mm to 24mm range (full frame) show a whole room, but very wide angles stretch furniture at the edges and make rooms look bigger than they are, which can disappoint guests who booked a room from the pictures. I try to stay honest: wide enough to explain the space, not so wide that a small room looks like a ballroom. Many interior photographers set the camera at about chest height, lower than eye level, so tables and counters look natural and you see a little of the floor.
Shoot from a corner or doorway to show the depth of a room, and try a straight-on view of the main wall for a calmer, symmetrical frame. For details, like a chandelier, a place setting or the grain of a reception desk, a 50mm or a short telephoto gives a cleaner picture than the wide lens. Apertures around f/8 to f/11 keep everything from the near chair to the far wall sharp, and on a tripod a slow shutter speed is no problem.
Exteriors
For the outside of a building, I start with the sun. I check which way the main facade faces and plan for the time of day when the light falls across it at an angle, which shows texture and depth. A front lit facade looks flat, and one in full shadow against a bright sky is hard to expose. In South Louisiana the heat haze and the afternoon storms also play a part; my notes on local weather and light help with planning.
Frame 03Mixed light
Interiors usually mix daylight from windows with warm lamps and sometimes greenish fluorescent or LED tubes. No single white balance setting suits them all, and the camera will happily show you an orange lamp corner next to a blue window.
| Light source | Looks on camera | What I do |
|---|---|---|
| Window daylight | Neutral to cool blue | Usually the main light; set white balance for it |
| Tungsten lamps | Strong orange | Keep a few for warmth, dim or switch off the rest |
| Fluorescent tubes | Green tint | Turn off if possible, or correct in editing |
| Mixed LED fixtures | Varies by bulb | Check each one; swap or switch off mismatched bulbs |
- Turn off lights that clash and let daylight do most of the work.
- Shoot at the time of day when inside and outside are close in brightness, often dusk for exteriors with lit windows. That blue twilight with warm windows is my favorite hotel exterior.
- Bracket exposures, taking several frames at different brightness, and blend them so both the windows and the room have detail.
- Bounce a flash off a white ceiling to lift dark corners, as long as it does not cast obvious shadows.
The single-light techniques from one-light flash work carry over, with the light bounced rather than aimed at a person. Window light in rooms behaves as described in the natural light portrait guide.
Frame 04Styling the room
I spend more time styling than shooting in most interiors. The camera sees everything, and a power cord or a crooked lampshade becomes the first thing a viewer notices.
- Remove clutter: cables, signs, trash cans, menus left on tables.
- Straighten chairs, cushions, curtains and table settings, and smooth the bedspread.
- Add a few signs of life, such as fresh flowers or a set table, without crowding the frame.
- Open or close curtains on purpose, depending on the view outside.
- Check every reflective surface, mirrors, glass and TV screens, for your own reflection.
- Look at the corners of the frame for half-cut objects.
Frame 05Practicing on landmarks
You do not need a client to practice. Some of my favorite Baton Rouge subjects are buildings: the new State Capitol, the LSU clock tower, the State Museum and that giant root beer mug downtown. The Capitol is a good test of everything above. At 450 feet and 34 stories it is the tallest state capitol in the country, according to Visit Baton Rouge, so you either stand far back with a longer lens to keep the lines straight or go close and wide and let it soar on purpose.
Campus buildings work well too, and I write about them as backdrops in the LSU campus guide. Old plantation houses and their oak alleys add symmetry and deep porches, covered in live oaks and historic grounds. Stone, columns and strong shadows often look even better in monochrome, which I explain in black and white conversion. And if you travel, old towns are wonderful practice; the narrow lanes and colored houses of Stockholm's old town are in my Sweden and Iceland notes.
Frame 06People in the space
Hotels and restaurants often want a few frames with staff or guests to show the place in use. A slow shutter, around 1/4 to 1 second on a tripod, can blur people walking through while the room stays sharp. For staff portraits in the same session, the advice in the headshot guide applies. Anyone recognizable in commercial images should sign a model release; ask the business who handles that.
Frame 07Permission and usage
Get written permission from the owner or manager before photographing a private interior, and agree on how the images will be used: website, brochures, booking platforms or press. Agree on the day and time too, so you are not working around guests or a lunch rush.
Public landmarks can be photographed from the street, but some buildings and grounds restrict commercial photography, a point that also comes up on the downtown Baton Rouge page. Clients will want both high-resolution files and web versions, and many like prints for a lobby wall; see the print size guide. The photography technique hub has the rest.